| |
FirstClass 7 Quick Reference
for web browsers
Contents
Copyright 2001, 2003 by Centrinity Inc.
SOF3023.0B
Centrinity Inc.
905-762-6000 or 1-800-763-8272
Web: www.centrinity.com
Notices
You must accept the FirstClass License Agreement before you can use this product. If you do not accept the terms of the License Agreement, do not install the software and return the entire package within 30 days to the place from which you obtained it for a full refund. No refunds will be given for returned products that have missing components.
Information in this document is subject to change without notice. Certain features and products described in this document may not be currently available in all geographic regions. Distribution or reproduction of this document in whole or in part must be in accordance with the terms of the License Agreement.
All rights reserved. FirstClass is a registered trademark of a Centrinity Inc. subsidiary used under license. Centrinity, the Centrinity logo, and the FirstClass logo are trademarks of Centrinity Inc. All other trademarks are property of their respective owners.
This edition applies to Version 7.1 of FirstClass and to all subsequent releases and modifications until otherwise indicated in new editions. This document is bound by international copyright law and the FirstClass Software License Agreement and Limited Warranty included with every FirstClass product.
Logging into a server
1 Enter the URL of the server (for example, http://www.centrinity.com/login).
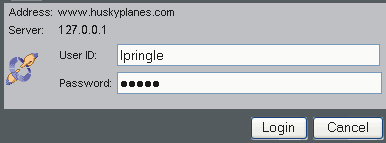
2 Fill in your user ID and password for this server on the FirstClass Login form.
3 Click Login to open your FirstClass Desktop.
The FirstClass Desktop
Once you have connected to a server, your Desktop on that server opens. Your Desktop may differ from the example below, because your administrator determines which conferences you start with on your Desktop, and the general Desktop appearance.
To open objects on the Desktop, click them. To select objects, select the checkboxes beside them.
Standard page elements
A - upper pane
This Desktop is split into two panes. The upper pane contents are shown as small icons.
B - lower pane
The lower pane contents are shown as a list, which presents information about each object in columnar format. You can change the sorting and grouping of these objects as described in our online help.
C - toolbar
Each page has its own toolbar. Clicking a toolbar button tells FirstClass to perform that command. Many toolbars contain the new object field, which lets you choose an object, then click New to create it:
D - page summary
This bar shows the page name, summarizes page contents, shows the server and your user name, and indicates permissions you have in this page.
Standard Desktop objects
Mailbox
Contains all messages sent to you, as well as copies of messages that you send.
Address Book
Contains your personal addresses and mail lists.
Calendar
Your personal calendar.
Home Page Folder
Contains material that you want to display over the web.
Bookmarks
Contains links to objects on your server.
Help
Contains online help. This can also be accessed from the Help Contents and About this Form buttons.
The other objects on our sample Desktop were added by the administrator or the user.
Working with messages
Messages work the same whether you are in your Mailbox or a conference. An unread message has a red flag beside it. To read a message, click it.
Creating a new message
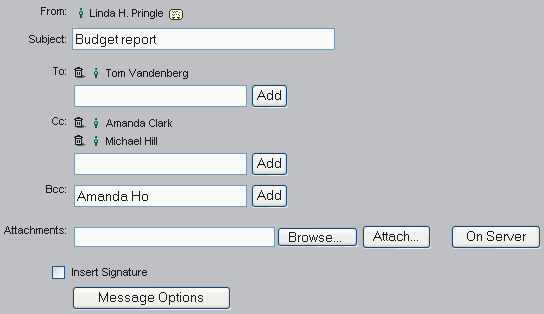
1 Choose the message form at the new object field, then click New.
If you decide you want to use another form, you can click Delete with the first form still open.
2 Address the message.
Tips for entering recipients' names:
• All users and conferences known to the server (including users you added as personal addresses) are stored in the Directory. To address a message to any user or conference in the Directory, you can type a partial name, then click Add. The whole name is filled in if what you typed is unique in the Directory. Otherwise, the Directory opens with a list of all names that match. Select the name you want, then click Select.
• If you are in a conference, your new message is automatically addressed to that conference.
• You can click a name in a sent message to create a preaddressed message.
3 Type the message text in the body section.
4 Attach a file to the message, if desired.
Click Browse at "Attachments" and select the file, then click Attach. To attach a FirstClass object, click On Server, then select the object.
5 Send the message by clicking Send.
Replying to a message
1 Open the message.
2 Click Reply.
The original message is quoted in the reply.
3 Type your reply in the body section.
4 Send the message.
Forwarding a message
1 Open the message.
2 Create a copy of the message (including any attachments) by clicking Forward.
3 Address the message.
4 Make any changes you want to the message body.
5 Send the message.
Downloading an attached file
To download a file attached to a message, use your web browser's standard download feature.
Checking whether a message has been read
To see the history of a sent message, including who has read it, click History with the message selected or open.
Saving addresses for future use
You can add your own addresses and mail lists to the Directory. Only you will see this information in the Directory.
Adding a personal address
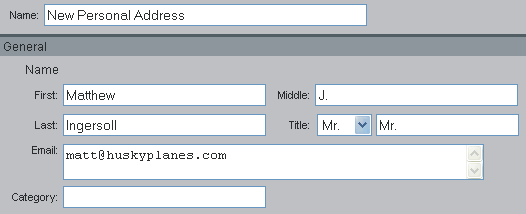
1 Choose New Personal Address at the new object field, then click New.
2 Update the New Personal Address form.
Creating a mail list
1 Choose New Personal Mail List at the new object field, then click New.
2 Update the New Personal Mail List form.
Files stored in containers
You can upload a file to a container on the server. Uploaded files can be previewed and downloaded just like files attached to messages.
Uploading files to containers
To upload a file to a container:
1 Open the container.
2 Click Upload.
3 Click Browse.
4 Select the file on your computer.
5 Click Upload.
Working with calendars
You can use a personal calendar (which can record both calendar events, such as meetings, and tasks, such as submitting a report), and look at other users' calendars and group calendars. To open your personal calendar, click Calendar. To open another user's calendar, select the user in the Directory or Who's Online list, then click Open User Calendar.
Viewing calendars
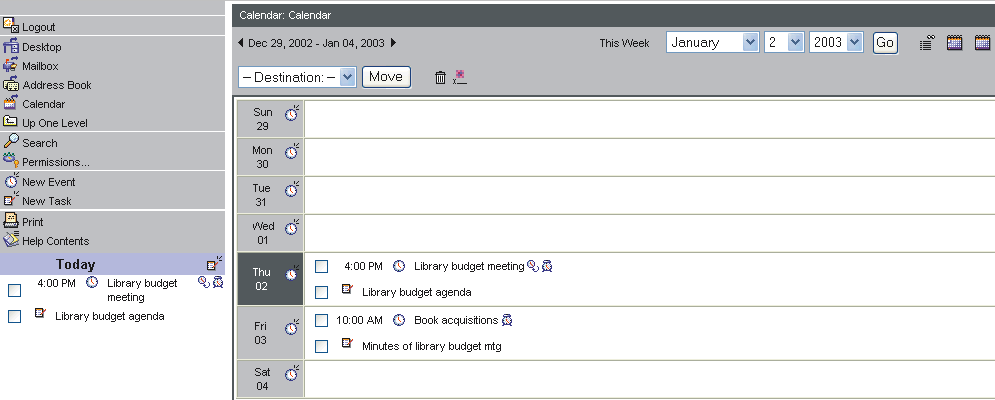
You can view a calendar by month, week, or day. The week view of a calendar looks something like this:
To view the calendar by month, week, or day, click the appropriate button.
To scroll from one month, week, or day to the next (or previous), click the arrows at either end of the dates at the top of the calendar.
To go to the current month, week, or day, click This Month, This Week, or Today.
To go to a specific date, specify the date using the dropdown fields, then click Go.
Calendar views include a Today list that highlights all the events that take place today, and all the tasks that start today or are ongoing.
Overdue tasks are shown in red. Completed tasks have a line drawn through them.
To view details of an event or task, click it.
Creating a calendar event
1 Open the calendar.
2 Click New Event.
Shortcuts
To create an event that starts on a particular date, click the New Event icon beside that date. In day view, click the start time. You can also create one event on your personal calendar without opening the calendar by choosing New Calendar Event from the new object field.
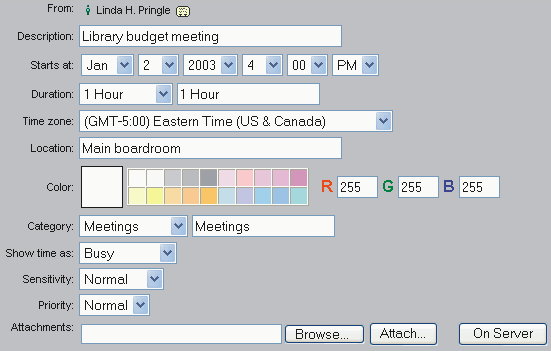
3 Update the basic information on the New Calendar Event form.
4 Update the other sections on this form as required.
To invite participants and/or book resources that are in the Directory, check for conflicts, or reschedule, update the Scheduling section.
To make the event show up repeatedly on the calendar, update the Repeat section.
To generate reminders, update the Reminders section.
5 Attach files or add content just as you would for a message, if desired.
You can open an event to change its details.
Creating a calendar task
1 Open the calendar.
2 Click New Task or the New Task icon in the Today list.
Note
You can also create a task on your personal calendar without opening the calendar by choosing New Calendar Task at the new object field.
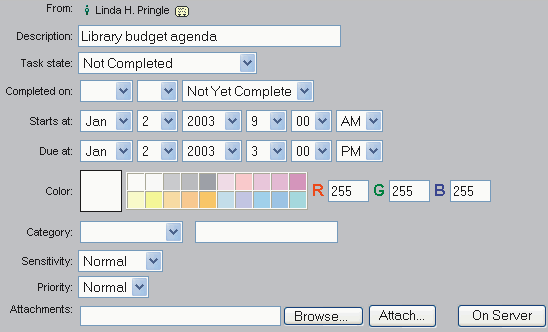
3 Update the basic information on the New Calendar Task form.
4 Update the Reminders section, if you want to generate reminders for a task with a due date.
5 Attach files or add content just as you would for a message, if desired.
You can open a task to change its details. To change the task status, choose the appropriate value at "Task state" (and "Completed on", if the task is completed). You can also change the status of an unopened task to Completed by clicking the task icon.
Chatting
A chat is an online conversation among users who are currently connected to a server.
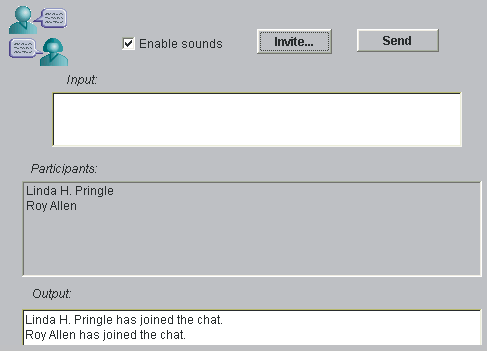
To contribute to a chat, type your comment in the input area of the chat window, then click Send.
Responding to a chat invitation
If you are invited to chat, you will see a chat invitation, showing the name of the user who invited you. To decline the chat invitation, click Decline. To join the chat, click Accept. The chat window opens and your name is added to the "Participants" list.
Joining a public chat
A public chat is created by your administrator. It appears as an icon inside a container. When a public chat has active participants, a red balloon appears beside the icon:
To join the chat, click it.
Starting a private chat
1 Click Private Chat.
2 Click Invite to invite someone to your chat.
3 Select the user you want to invite from the Who's Online list.
4 Contribute to the chat as you would to any other chat.
|

