| |
|
Window pane views
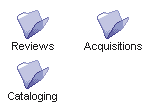
You can view the objects in a window pane as large icons:
small icons:
or a multi-column list:
Normally, a two-pane window with a horizontal scroll bar shows objects in the upper pane as large icons and objects in the lower pane as a list.
Changing the view
To change the view for a window pane:
1 Click the pane you want to change.
2 Specify the view you want.
To see large icons, choose View > View by Icon. To see small icons, choose View > View by Small Icon. To see a multi-column list, choose View > View by List.
You can also choose the view you want at the "Display format" field on the Sorting tab of the View Properties form.
Changing view properties
Many of the changes you can make to a window pane involve changing view properties. To do this:
1 Click the window pane you want to customize.
2 Choose View > Change View Properties.
3 Click the tab on the View Properties form that contains the property you want to change.
4 Make the change.
To change a property without closing the View Properties form, click Apply.
To reset all view properties to the FirstClass defaults, click Default.
Note
Be cautious about clicking Default. All your view properties will be reset, not just the properties showing on the active tab.
Changes you can make in all views
Changing text properties
To change the text appearance in a window pane, update the "Font", "Size", and "Use color" fields on the Display tab of the View Properties form.
Using a picture as a background
You can apply a picture as the background of a window pane (such as the top pane of your Desktop). The same limitations apply as for adding backgrounds to certain areas of FirstClass windows:
• you must display these windows in 3D
• the pictures you want must be stored on your server, in the FirstClass Images folder, or in your settings file.
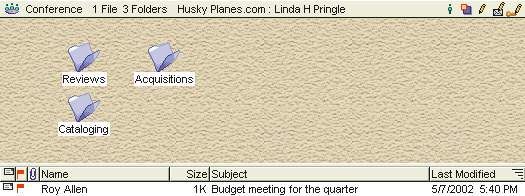
The following example shows a top pane with a customized background:
To change the background of a pane, update the Background tab of the View Properties form.
Changes you can make in icon views
Moving icons
You can move an icon in the following ways:
• drag it
Once you start to drag an icon, its horizontal and vertical position (number of pixels from the top and left side of the window pane) are displayed in the status bar.
• move it one pixel at a time
Select the icon, then press Control-Shift (Windows, Linux) or Option (Mac OS, Mac OS X) while using the arrow keys. As is the case for dragging, the icon's horizontal and vertical position is shown in the status bar.
• specify its horizontal and vertical position.
Open the icon's object properties, then update the "Horizontal position" and "Vertical position" fields.
Aligning icons to the grid
You can tidy up icons by aligning them to an invisible grid. To do this:
1 Click the window pane.
2 Choose View > Line Up Icons to Grid.
If you cannot move an icon
If you cannot move an icon, check whether:
• your administrator has not given you permission to move objects
• the icon is protected
• you have "Lock icon positions" selected on the Icons tab of the View Properties form.
Locking icon positions
To lock icons in position so that they cannot be moved, select "Lock icon positions" on the Icons tab of the View Properties form.
Blending icon titles with the background
If you apply a background image to a pane, you will notice that icon titles have a white background. As you can see from the example of the pane background above, this is useful for readability when backgrounds are dark or busy.
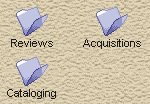
If you do not want this white background, select "Transparent text" on the Background tab of the View Properties form. Your icon will then look something like this:
Hiding icon titles
If you do not want to see the text associated with an icon, select "Hide icon titles" on the Icons tab of the View Properties form.
Changes you can make in List view
Hiding column headings
By default, List view shows headings at the top of each column. If you do not want column headings, clear "Show column titles" on the Display tab of the View Properties form.
Resizing columns
To change the width of a column, position the cursor over the edge of the column heading until the cursor looks like a double-ended arrow, then drag the column heading edge to make the column wider or narrower.
Changing column order
To change the order in which columns are displayed, drag column headings to the desired location.
Showing gridlines
To show horizontal gridlines that separate the rows in List view, select "Show horizontal gridlines" on the Display tab of the View Properties form.
To show vertical gridlines that separate the columns in List view, select "Show vertical gridlines" on this tab.
Showing row numbers
To show row numbers to the left of rows in List view, select "Show row numbers" on the Display tab of the View Properties form.
Sorting by column
You can specify which column you want to sort on by clicking the appropriate column heading.
Another way to specify which column to sort on is to choose the column at "Sort on" on the Sorting tab of the View Properties form.
There are a few sorting rules to note:
• if you sort on Name, FirstClass sorts items by the name of the sender (for incoming messages) or receiver (for outgoing messages)
• if you sort on Flag, FirstClass sorts items in this order:
• unsent messages
• urgent incoming messages, by date
• normal incoming messages, by date
• urgent outgoing messages, by date
• normal outgoing messages, by date
• if you sort on Attachment, FirstClass lists messages that include attachments first.
Reversing sort order
To reverse the sort order of the column on which you are sorting, click the column heading.
You can also reverse sort order by selecting "Reverse sort" on the Sorting tab of the View Properties form.
Showing the newest item first
To list items from newest to oldest, select "Show newest items first" in your viewing preferences.
Grouping items
You can group all items by a column, such as Name or Subject. This puts the items with the same name or subject together. For example, this is a Mailbox grouped by subject:
A grouping column is displayed to the left of the Subject column in this example. The grouping column shows tree view buttons (Windows, Linux) or disclosure triangles (Mac OS, Mac OS X) beside grouped items.
To group items for a particular column, Control-click (Windows, Linux) or Option-click (Mac OS, Mac OS X) the appropriate column heading.
Another way to specify which column to group on is to choose the column at "Group items on" on the Sorting tab of the View Properties form.
To remove grouping, Control-click or Option-click the grouping column heading.
There are two grouping rules to note:
• if you use both sorting and grouping, FirstClass keeps groups together and sorts the list as a whole by the first item in each group
Items are also sorted within each group.
• if you group the Subject column, FirstClass groups messages by message threads, rather than alphabetically by subject.
Collapsing and expanding groups
To collapse a group so that you only see the first item in the group, click the button/triangle beside the group.
To expand a collapsed group, click the same button/triangle.
To collapse or expand all groups, click the grouping column heading. You can also collapse or expand all groups by using the "Collapse all groups" field on the Sorting tab of the View Properties form.
|


